Setup DNS & Certificates
Enabling DNS for the application vastly improves the user experience. It allows the user to access the application using a fully qualified domain name (FQDN) instead of an IP address. It also allows the application to be accessed from outside the local network.
NoteHaving a FQDN is required to secure the application with a TLS certificate.
While the hosting provider may offer DNS services or a public name for your machine, this is not always the case and is often a chargeable service.
Using a free account from Cloudflare is both easy and allows you to benefit from their global CDN network.
Setup Cloudflare
- Create a free account at Cloudflare.
- Add your domain to Cloudflare.
- Cloudflare will provide you with two name servers. You will need to update your domain registrar to use these name servers.
- Once the name servers are updated, you can add DNS records to Cloudflare. You will need to add an A record for the domain and a CNAME record for the subdomain.
- The A record should point to the IP address of your server. The CNAME record should point to the domain name.
- Once the DNS records are updated, you can test the configuration by pinging the domain and subdomain. You should see the IP address of your server.
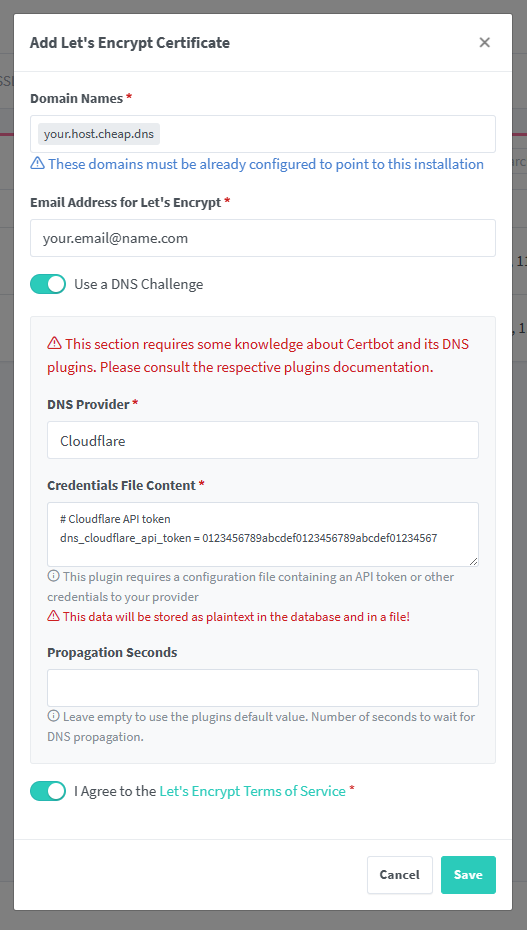
- Generate your API key from the Cloudflare Dashboard to allow Certbot to automatically update your DNS records.
Setup TLS
The One37 Upa! Wallet requires a secure the connection to One37 Business Connector agents.
The recomended Nginx Proxy Manager includes a built-in Let's Encrypt client that can automatically generate and renew SSL certificates for your agent domains. To enable this feature, you need to configure the Nginx Proxy Manager to use the Let's Encrypt client.
You can also get TLS certificates from any provider and manually import them into Nginx Proxy Manager.